Friday, April 18, 2014

T-Shirt Cutting Kick

Multiple posts on one day! Well...apparently my last post (a few weeks ago) did not publish...so I finally checked it again and managed to publish it. I apologize for the wait!
Okay, I realize this is not a nail tutorial. O.o I know right, weird. However, I have recently been dealing with the Nerd Law of Shirts. What is this Nerd Law of Shirts? It basically states that all the awesome t-shirts are designed for guys, so they're incredibly unpleasant for women to wear. 
I have an over-population of man t-shirts (unfitted t shirts with long baggy sleeves and huge/long torsos), thus I've been attempting to rectify the problem by cutting them up! Here are a few of my tactics. 

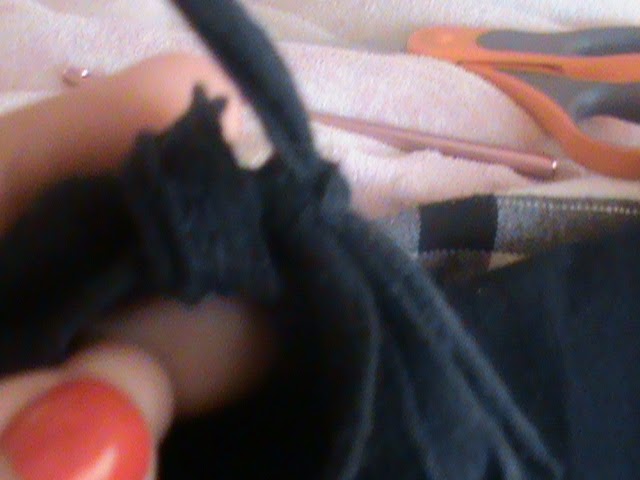
To fit the shirt, you can crochet it. This is extremely easy, and looks really nice. All you have to do is cut strips about the size of your pinky finger up the edge of the sleeve/side of the shirt. (F1, F2)Find your largest crochet needle. Treat the strips of fabric just like you would yarn - the thicker the strip, the thicker the needle. (F3) On a shirt, the fabric strips will inherently be thicker than most yarn. For the actual crocheting, start at the shoulder and crochet down for the sleeve. If you're doing the side of a shirt, start at the hip and crochet up to the arm pit. At the end, cut the last strip of fabric in two and knot around the previous stitch. This will create a nice loop that will slide over and cover the knot. (F4)
F1

F2

F3

F4

Another nice effect is the indian fringe. This is very simple. if slightly time consuming. Get a men's extra large t shirt (otherwise it'll be too small and then where will we be?) If you're petite, you can always trim the fringe later. Cut strips of shirt about an inch wide down the entire length of the shirt from arm pit to hem. Then cut each strip in half along the folding line. The only other step is to tie each half of a strip together, effectively making the shirt smaller, fitted, and cool looking. Make sure you tie each knot very tight, otherwise you'll have to wear other shirts underneath. 


This doesn't exactly fit the shirt, but it adds some flare. :) I bought cheap shirts at 5 Below and made wing templates. 

When making templates, you have to be really careful to make the holes far enough apart. When I first tried making a template, it was too flimsy, and the shirt ripped while I was trying to cut it. :-/ However these templates worked perfectly. I then transferred the design to the shirt with a sharpie. WARNING: sharpie bleeds through, so I suggest sticking a piece of cardboard inside the shirt to keep from ruining the front. 
Snip snip, and wallah! Both shirts turned out better than I had hoped, and I will definitely be doing this again! Hope you enjoyed!


Ahhhh Delightful Symmetry....

This is the first time I've actually used stripping tape directly in the design. Here I must admit my OCD tendencies and say that the fact that stripping tape provides a perfectly straight line completely made my day. XD However it is RIDICULOUSLY difficult to get the stuff to stick in the right spot...so enjoy your stripping tape conniptions! 


Monday, March 31, 2014

Stripping Tape Nail Art Fun!!!!

Okay so I ordered 30 rolls of stripping tape for two bucks from amazing (free shipping!!!!!) Part of my order arrived yesterday so I set about doing some designs! The finished product of this particular design doesn't directly involve stripping tape, unfortunately. See stripping tape has a dual purpose - you can use it to create layers of paint with patterns, or you can create a pattern with colored stripping tape. I decided on the former.

First I did a rather sloppy first coat with the colors I wanted to peek through the final layer. It's really messy because the green color doesn't spread well so I had to be creative while painting it on and trying to maintain some semblance of a straight line...
Then I added stripping tape lines. I let the tape go further than the nail so I could pull it off easily when I finished. You don't want to be scrabbling for the end of a piece of tape when your nails are wet. Also, be sure to let the under layer dry COMPLETELY before adding the stripping tape...otherwise when you take the top off, the under layer will come with it. 
Then I added a layer of black over everything
This is the tricky part. You have to let the top layer set so that when you take the tape off the paint doesn't run into the grooves. However you have to be careful not to let it dry much, otherwise you'll rip off the entire top layer. 
Cleaned up with some cotton swabs and nail polish remover, and added top coat. 
Tada! Hope you enjoyed! More fun with stripping tape to come!
XD 

Saturday, March 22, 2014

Epical Cursive

The fat brushes in some nail polish are AMAZING....
Seriously, it's so much easier not to smudge it all over your fingers! How do you know it's a fat brush? Only way to tell is check the bottle. :( However Wet n Wild Megalast typically has the fat brushes.

Enjoy! :) 

Sunday, March 16, 2014

Strawberry Awesomeness

So I haven't posted for a while. I'm so very sorry. However I've been insanely busy...you know, video games to play, rooms to clean, papers to write and due dates to cry over.....
Before I begin, I would like to rant for a bit about my new favorite brand of nail polish! I know that previously I have been under the impression that all nail polish is created equal, but I have since changed my ways. You see Butter London is professional grade, and actually pretty expensive. While most nail polishes cost from $2-$10, Butter London costs $14 on up. However this polish is the smoothest thing you have EVER MET! It requires two coats, max, and it layers very evenly. It is seriously the best quality nail polish I have used. So I amend my statement - all student-grade nail polishes are created equal, but professional grade polish is in a world of its own....I will definitely be collecting more Butter London.

So there you see the strawberries. For the leaves, just make sure you use a nice thick polish, so that you don't end up doing more than one coat. It can get messy otherwise. 
Tip: If you're going to paint a design in a different color on top of a bright base color, add a coat or two of top coat BEFORE you paint the design. That way, the colors won't blend and it will be much easier to get a good design with the first coat. 
Hope you enjoyed!

Friday, February 21, 2014

Real Live Awesome Wedding Nails!

So my sister is getting married on Saturday the 22nd! *insert massive celebration here*
We're all extremely excited, and she's marrying a great guy! Congrats dear! XD
I got to do her nails for the wedding, and since her colors are ivory, silver and navy blue, I did a pretty french mani with pearl and sparkles. In case you're wondering, the blue nails are mine. Didn't have time or energy for a design this time around. We had to take the pics super fast because we're major busy...
Anyway, hope you enjoyed! Rimmel London Pro French Tip Painter is my best friend...


Tuesday, February 18, 2014

No Face Nails

Ahahahahahaaaa that has to be the lamest pun I've ever made...As you can tell I've been watching some Studio Ghibli Animes...Hope you enjoy! :P


Wednesday, February 12, 2014

Valentine's Design

This is my Valentine's Day design! Now I know what you're thinking...."But Lody, you are sporting neither red, nor white, nor pink. There are no hearts and no representations of the popular adage of love!"
You see though, I'm pretty sure almost every other person in the world is wearing red white and pink, so clearly no more is needed. XD I have decided to take a more geeky approach to the season of love: presenting the three words every Whovian wanted to hear after the prefix "Rose Tyler-" 
Yes this is "I Love You" written in Gallifreyan! (With a nice sparkly spacey wacey background). For those of you who don't know what that is, I'm sorry. I'm so so sorry. Admittedly it's a little hard to distinguish the vowels from the consonants, but rest assured that every letter is more or less represented... Happy Valentines' Day to you all!
Used:
Funky Fingers "Hip City Jack"

Monday, February 10, 2014

3D Snowflake Tutorial

This past weekend we had a bridal shower for my sister, who is (obviously) getting married! *cue applause* 
I got to help with the decorations, and so I made some large snowflakes to hang up and/or tape up to frame the room that we were decorating. I don't think people realize how incredibly easy they are to make, so I'm going to add my voice to the proverbial chant and make a tutorial for you all. XD


First we cut a square. This is pretty simple...just fold an isosceles triangle and cut off the edge of the paper. 


 Next, take your lovely triangle and cut it into strips. You want the same number of cuts on both sides, preferably with matching thicknesses. The trick, however, is to not cut all the way up. You want a strip of paper, about the size of your ring finger and your pinky finger together, to run down the middle between the cuts, joining them together. 

Make six of these for each snowflake you want to make. 


Now unfold your lovely triangle so that it makes a square with diamond-shaped cuts in it. 


Then take the smallest diamond (the one in the middle) and fold the corners up. Curl then into a roll and tape them together. 


Like so. Then flip the paper over and repeat with the next smallest diamond. You want each diamond circle 
to face the opposite way of the last one, so that you ultimately end up with a fairly even decoration.

You'll end up with this. Repeat until you've done the other 5.
Then join them into groups of three with tape. 
 Join the two groups of three with a staple at the middle. 


Punch a whole in the tip of one of the pieces, attach ribbon, and hang or tape where desired! XD 


Hope you enjoyed! XD


Monday, January 27, 2014

Cupcake Catastrophe

Don't ask me why I called it that. I don't know why I called it that. Do I always have to have a reason?
Yes, I'm a horrible blogger. But you know...Christmas! And then exams.....>< And then starting the new semester....not to mention the fact that my sister's getting married in less than a month. I have a few excuses....
But I finally got around to painting my nails!
I have previously attempted cupcakes with disastrous results....however I recently learned how to draw very nice and simple cupcakes without much effort. I'm not much of a detail painter...more an impressionist I'd say....
Anyway! 
polishes used:
Funky Fingers "Lazer Pink"
Rimmel London "French White Tip Pro"
Fresh Paint "Lucky"
Art Club "Technicolor Doll"


The trick for the cupcake (as you can see) is to make the swirls form a stacked "s" shape. It works better with more room, but I have rather tiny nails...lol...
 XD
Anyway enjoy! And hopefully I'll be back soon.....

Monday, December 23, 2013

Candy Kisses

My sister has been pestering me to do a peppermint mani....however I think those are horribly overdone....SO I decided to use another holiday candy.....
The chocolate color is done with Revlon "Hot for Chocolate" 

Hope you enjoyed, and Merry Christmas! XD