Friday, February 21, 2014

Real Live Awesome Wedding Nails!

So my sister is getting married on Saturday the 22nd! *insert massive celebration here*
We're all extremely excited, and she's marrying a great guy! Congrats dear! XD
I got to do her nails for the wedding, and since her colors are ivory, silver and navy blue, I did a pretty french mani with pearl and sparkles. In case you're wondering, the blue nails are mine. Didn't have time or energy for a design this time around. We had to take the pics super fast because we're major busy...
Anyway, hope you enjoyed! Rimmel London Pro French Tip Painter is my best friend...


Tuesday, February 18, 2014

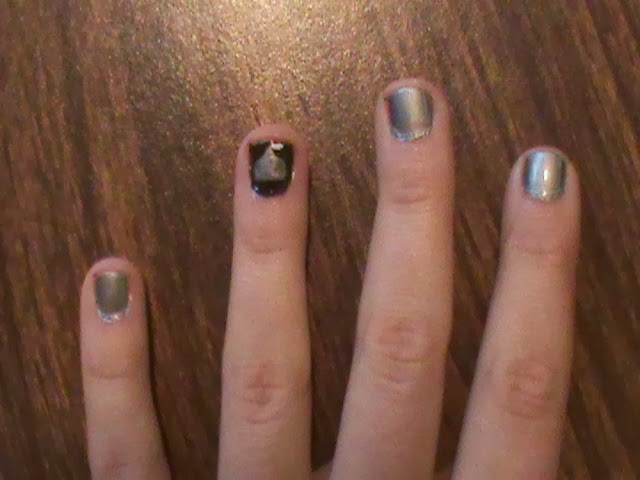
No Face Nails

Ahahahahahaaaa that has to be the lamest pun I've ever made...As you can tell I've been watching some Studio Ghibli Animes...Hope you enjoy! :P


Wednesday, February 12, 2014

Valentine's Design

This is my Valentine's Day design! Now I know what you're thinking...."But Lody, you are sporting neither red, nor white, nor pink. There are no hearts and no representations of the popular adage of love!"
You see though, I'm pretty sure almost every other person in the world is wearing red white and pink, so clearly no more is needed. XD I have decided to take a more geeky approach to the season of love: presenting the three words every Whovian wanted to hear after the prefix "Rose Tyler-" 
Yes this is "I Love You" written in Gallifreyan! (With a nice sparkly spacey wacey background). For those of you who don't know what that is, I'm sorry. I'm so so sorry. Admittedly it's a little hard to distinguish the vowels from the consonants, but rest assured that every letter is more or less represented... Happy Valentines' Day to you all!
Used:
Funky Fingers "Hip City Jack"

Monday, February 10, 2014

3D Snowflake Tutorial

This past weekend we had a bridal shower for my sister, who is (obviously) getting married! *cue applause* 
I got to help with the decorations, and so I made some large snowflakes to hang up and/or tape up to frame the room that we were decorating. I don't think people realize how incredibly easy they are to make, so I'm going to add my voice to the proverbial chant and make a tutorial for you all. XD


First we cut a square. This is pretty simple...just fold an isosceles triangle and cut off the edge of the paper. 


 Next, take your lovely triangle and cut it into strips. You want the same number of cuts on both sides, preferably with matching thicknesses. The trick, however, is to not cut all the way up. You want a strip of paper, about the size of your ring finger and your pinky finger together, to run down the middle between the cuts, joining them together. 

Make six of these for each snowflake you want to make. 


Now unfold your lovely triangle so that it makes a square with diamond-shaped cuts in it. 


Then take the smallest diamond (the one in the middle) and fold the corners up. Curl then into a roll and tape them together. 


Like so. Then flip the paper over and repeat with the next smallest diamond. You want each diamond circle 
to face the opposite way of the last one, so that you ultimately end up with a fairly even decoration.

You'll end up with this. Repeat until you've done the other 5.
Then join them into groups of three with tape. 
 Join the two groups of three with a staple at the middle. 


Punch a whole in the tip of one of the pieces, attach ribbon, and hang or tape where desired! XD 


Hope you enjoyed! XD


Monday, January 27, 2014

Cupcake Catastrophe

Don't ask me why I called it that. I don't know why I called it that. Do I always have to have a reason?
Yes, I'm a horrible blogger. But you know...Christmas! And then exams.....>< And then starting the new semester....not to mention the fact that my sister's getting married in less than a month. I have a few excuses....
But I finally got around to painting my nails!
I have previously attempted cupcakes with disastrous results....however I recently learned how to draw very nice and simple cupcakes without much effort. I'm not much of a detail painter...more an impressionist I'd say....
Anyway! 
polishes used:
Funky Fingers "Lazer Pink"
Rimmel London "French White Tip Pro"
Fresh Paint "Lucky"
Art Club "Technicolor Doll"


The trick for the cupcake (as you can see) is to make the swirls form a stacked "s" shape. It works better with more room, but I have rather tiny nails...lol...
 XD
Anyway enjoy! And hopefully I'll be back soon.....

Monday, December 23, 2013

Candy Kisses

My sister has been pestering me to do a peppermint mani....however I think those are horribly overdone....SO I decided to use another holiday candy.....
The chocolate color is done with Revlon "Hot for Chocolate" 

Hope you enjoyed, and Merry Christmas! XD

Sunday, December 15, 2013

Snow and Presents

It was said by someone somewhere (I have no clue where...I think I heard it in a movie, but you know how quotes travel) that when you make a mistake while painting, you should make them into birds. It's actually an excellent idea! If you take this to be a general rule, then you can conclude that paintings withs lots of birds in them are made by the most klutzy painters. Of course this is rather unjust, but I'm having fun with the theory. Take, for instance, those who decide to dedicate the entire painting to birds. What does this say about them?

Anyway, that all to say: a mistake is only a mistake if the artist says it is.

Done with Rimmel London French Tip painter and Glosser


Incidentally....I HAVE DISCOVERED THE FRENCH MANICURE FOR THE SHORT FINGERNAIL!!!!!!!!!
The snow makes it elegant but not shortening...
As for the ring finger decoration...well that's my bird. It started out as a snowflake. Then it became a star. And last (but definitely most important) it became a present bow. Evidently a Hanukkah present bow. This is what happens when you decide to paint your nails at 10:00 at night, my friends....XD
I hope you enjoyed!

Monday, December 9, 2013

Katniss Hair!

I think a universal rule is this: either you can braid your own hair, or you can braid other people's hair. I can't braid my own hair to save my life. But I can do a pretty good braid for someone else.
Whenever my sister comes to visit, I like to style her hair, and this time I decided to attempt the sweeping french braid, otherwise known as the "Katniss" braid. 
I think it turned out pretty well, don't you think?
All I did was start a french braid on the side of her head and bring it around to the other side (as seen in the first pic)
Then I started another, shorter french braid that met the first right behind her ear.
I secured each with a clear elastic and braided the rest of the way down.
XD


Hope you enjoyed!

The Beginning of the Christmas Nails

My sisters came to visit this weekend, so I got the chance to do some french manicures! XD
Unfortunately the quality isn't very good because I didn't have a whole lot of time, but they're content, and that's all that matters. 


Monday, December 2, 2013

Mario Nails!

When I first painted these nails I showed them to my sister and asked "What are these little red and green things?"
And what did she say?
"EASTER EGGS!!!!!!!!"

-_-

So I showed them to her fiance. And what did he say?
"Mushrooms!"

The second answer would be the correct one. 
Rather than making a complicated (and probably utterly pointless) effort at painting Yoshi or even Mario himself, I decided to zero in on the mushrooms, with rather great success, if I dare say so myself!

There's no polish used list because I'm too lazy today. XD 


Enjoy! 

Monday, November 18, 2013

Pearl Sparkles

So I tried to paint my nails 3 times this week. And each time was a horrific flop. I either ruined the design or messed up the paint doing housecleaning. 
So this time I decided to go simple and foolproof. XD

Polishes Used: 
Revlon "Pure Pearl"
Funky Fingers "Stage Dive" 


So I was thinking....winter wedding colors? They're nice and icy, and for those of you that like sparkle....;)
Yes? No?

Anyway I hope you enjoyed!

Tuesday, November 5, 2013

The One All About TopCoat

So I thought I'd bring you my complete guide to the wonders and horrors of topcoat! This is not an EXHAUSTIVE guide seeing as I'm finite and thus I haven't tried every single topcoat that exists...but i have tried a few of them....

Sally Hansen "Dries Instantly" 
Okay, I like this topcoat, but it isn't my favorite. You see, the only function it performs is being fast drying. That's it. I have found other topcoats that not only dry fast, but also protect well.

Revlon "Extra Life No Chip"
This topcoat works well - it prevents chips excellently and (basically) does everything it advertises. However it takes FOREVER to dry, so if you want your nails to look nice and don't want to sit still for 2 hours....this is not your best bet.

Sally Hansen "No Chip"
This topcoat. Is a lie. Not only has this topcoat FAILED to keep my nails from chipping, but it in fact cracks the nail polish causing chips faster than if I hadn't worn top coat at all! I strongly advise against it. 

Ulta "X-Dry"
I don't really know what "X-Dry" means. I just know that this topcoat takes an annoyingly long time to dry and doesn't really protect your nails.

inm "OutTheDoor"
This. Is. My ABSOLUTE favorite topcoat EVER! It dries super fast, and it protects like nobody's business. My nails hardly ever chip, and, (most importantly) with 2 or 3 coats of this stuff, your rhinestones will not come off!

Orly "Glosser" 
My last post featured Glosser, and I think it's pretty cool! It's uber shiny - much shinier than regular topcoat. It also protects reasonably well. This is a good buy.

Orly "Matte Top"
This is also a good buy. It works well - it makes your nails look matte. However, it doesn't' protect well. It makes the polish soft and it can easily dent and rub off. However my opinion is that it's worth it for the look. 

So that's! I hope you enjoyed, and thanks for visiting! 

Monday, November 4, 2013

(That is) Mahogany!!!


Okay. I think I deserve a little bit of applause for lame and corny Hunger Games jokes, right? Right?

I went to Ulta the other day in search of a new bottle of French Tip painter (can you guess why?) and I happened to discover a display of tiny, weird colored bottles with awesome names like "Cuticle Oil" and "2 Second Dry"
After some serious consideration, I came away with a little bottle of topcoat labeled "Glosser" which the employees told me worked REALLY well.
And I agree. I agree wholeheartedly. 

Polishes Used:
Revlon "Raven Red"
Rimmel London "French White Tip PRO"
Orly "Glosser"


Thanks for visiting and I hope you enjoyed!

Matte and Perhaps a Bit Japanese?

As you can tell, I like black nails. Why, you ask? I like colors that pop - so neons etc. However, black goes with just about everything! I can use any color combination with the same base! 

Colors used:
Wet and Wild 'Wild Shine' "Black Creme"
Funky Fingers "Pop Artist"
Rimmel London "French White Tip PRO"
Orly "Matte Top" 


I love the affect of matte polish. It's unassuming and quiet, but it's so unusual that it somehow manages to grab attention while turning it away. Weird. But cool, right? 
As for the little black spot at the edge of the fan shape, I just used a paint dot on this particular design. In  previous versions though, I've used a rhinestone. To make it pop I'd use black, but any other color would work.
It's kind of hard to find tiny rhinestones, so I went online. Amazon sold me a great rhinestone wheel for about 4 bucks (minus shipping). 
So I hope you enjoyed, and thanks for visiting. :)